clonebox
CloneBox 📦
![]()
![]()
![]()
![]()
╔═══════════════════════════════════════════════════════╗
║     ____  _                    ____                   ║
║    / ___|| |  ___   _ __   ___|  _ \  ___ __  __      ║
║   | |    | | / _ \ | '_ \ / _ \ |_) |/ _ \\ \/ /      ║
║   | |___ | || (_) || | | |  __/  _ <| (_) |>  <       ║
║    \____||_| \___/ |_| |_|\___|_| \_\\___//_/\_\      ║
║                                                       ║
║      Clone your workstation to an isolated VM         ║
╚═══════════════════════════════════════════════════════╝
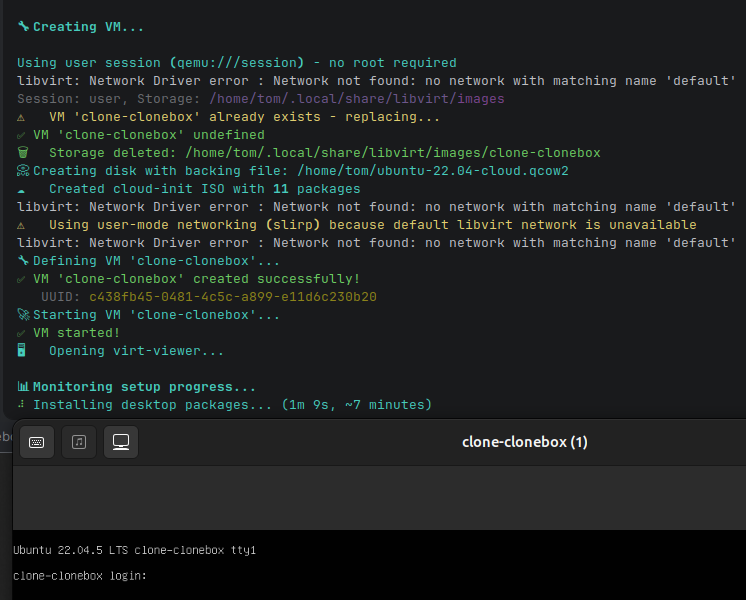
Clone your workstation environment to an isolated VM in 60 seconds using bind mounts instead of disk cloning.
CloneBox lets you create isolated virtual machines with only the applications, directories and services you need - using bind mounts instead of full disk cloning. Perfect for development, testing, or creating reproducible environments.
Features
- 🎯 Selective cloning - Choose exactly which paths, services and apps to include
- 🔍 Auto-detection - Automatically detects running services, applications, and project directories
- 🔗 Bind mounts - Share directories with the VM without copying data
- ☁️ Cloud-init - Automatic package installation and service setup
- 🖥️ GUI support - SPICE graphics with virt-viewer integration
- ⚡ Fast creation - No full disk cloning, VMs are ready in seconds
- 📥 Auto-download - Automatically downloads and caches Ubuntu cloud images (stored in ~/Downloads)
- 📊 Health monitoring - Built-in health checks for packages, services, and mounts
- 🔄 Self-healing - Automatic monitoring and repair of apps and services
- 📈 Live monitoring - Real-time dashboard for running applications and services
- 🔧 Repair tools - One-click fix for common VM issues (audio, permissions, mounts)
- 🔄 VM migration - Export/import VMs with data between workstations
- 🧪 Configuration testing - Validate VM settings and functionality
- 📁 App data sync - Include browser profiles, IDE settings, and app configs
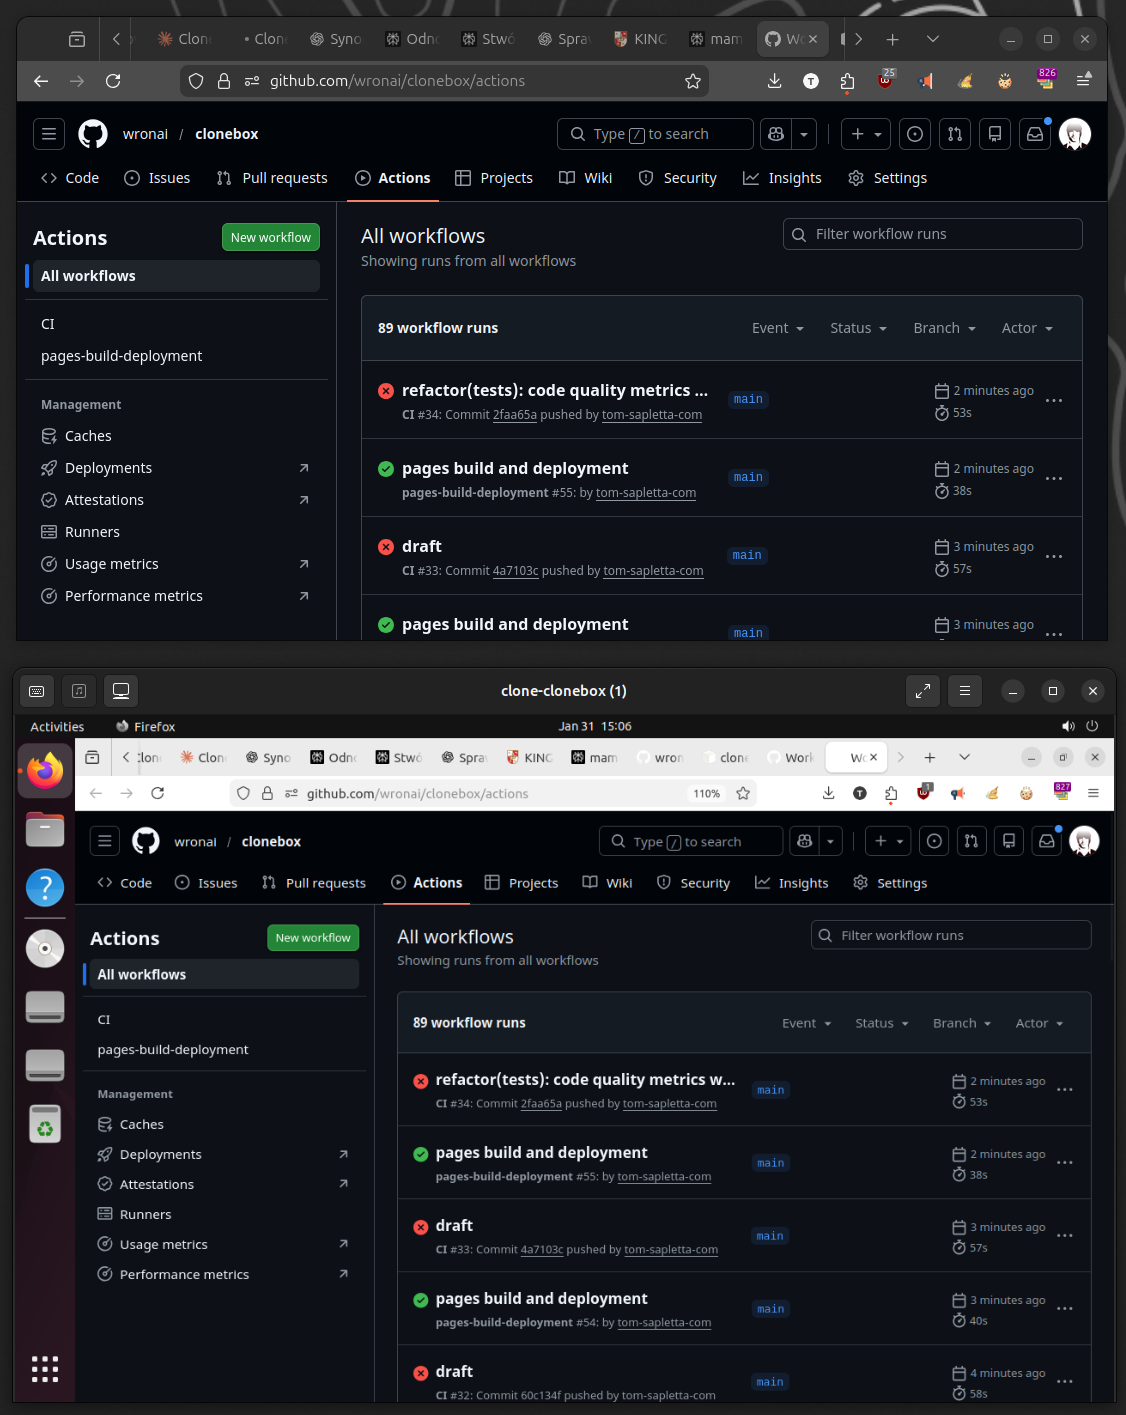
GUI - cloned ubuntu
Use Cases
CloneBox excels in scenarios where developers need:
- Isolated sandbox environments for testing AI agents, edge computing simulations, or integration workflows without risking host system stability
- Reproducible development setups that can be quickly spun up with identical configurations across different machines
- Safe experimentation with system-level changes that can be discarded by simply deleting the VM
- Quick onboarding for new team members who need a fully configured development environment
What’s New in v1.1
v1.1.2 is production-ready with two full runtimes and P2P secure sharing:
| Feature | Status |
|---|---|
| 🖥️ VM Runtime (libvirt/QEMU) | ✅ Stable |
| 🐳 Container Runtime (Podman/Docker) | ✅ Stable |
| 📊 Web Dashboard (FastAPI + HTMX + Tailwind) | ✅ Stable |
🎛️ Profiles System (ml-dev, web-stack) |
✅ Stable |
| 🔍 Auto-detection (services, apps, paths) | ✅ Stable |
| 🔒 P2P Secure Transfer (AES-256) | ✅ NEW |
| 📸 Snapshot Management | ✅ NEW |
| 🏥 Health Check System | ✅ NEW |
| 🧪 95%+ Test Coverage | ✅ |
P2P Secure VM Sharing
Share VMs between workstations with AES-256 encryption:
# Generate team encryption key (once per team)
clonebox keygen
# 🔑 Key saved: ~/.clonebox.key

# Export encrypted VM
clonebox export-encrypted my-dev-vm -o team-env.enc --user-data

# Transfer via SCP/SMB/USB
scp team-env.enc user@workstationB:~/

# Import on another machine (needs same key)
clonebox import-encrypted team-env.enc --name my-dev-copy

# Or use P2P commands directly
clonebox export-remote user@hostA my-vm -o local.enc --encrypted
clonebox import-remote local.enc user@hostB --encrypted
clonebox sync-key user@hostB  # Sync encryption key
clonebox list-remote user@hostB  # List remote VMs
Snapshot Management
Save and restore VM states:
# Create snapshot before risky operation
clonebox snapshot create my-vm --name "before-upgrade" --user

# List all snapshots
clonebox snapshot list my-vm --user

# Restore to previous state
clonebox snapshot restore my-vm --name "before-upgrade" --user

# Delete old snapshot
clonebox snapshot delete my-vm --name "before-upgrade" --user
Health Checks
Configure health probes in .clonebox.yaml:
health_checks:
  - name: nginx
    type: http
    url: http://localhost:80/health
    expected_status: 200

  - name: postgres
    type: tcp
    host: localhost
    port: 5432

  - name: redis
    type: command
    exec: "redis-cli ping"
    expected_output: "PONG"
Run health checks:
clonebox health my-vm --user
Roadmap
- v1.2.0: Resource limits, progress bars, secrets isolation
- v1.3.0: Multi-VM orchestration, cluster mode
- v2.0.0: Cloud provider support (AWS, GCP, Azure), Windows WSL2 support
See TODO.md for detailed roadmap and CONTRIBUTING.md for contribution guidelines.
CloneBox to narzędzie CLI do szybkiego klonowania aktualnego środowiska workstation do izolowanej maszyny wirtualnej (VM). Zamiast pełnego kopiowania dysku, używa bind mounts (udostępnianie katalogów na żywo) i cloud-init do selektywnego przeniesienia tylko potrzebnych elementów: uruchomionych usług (Docker, PostgreSQL, nginx), aplikacji, ścieżek projektów i konfiguracji. Automatycznie pobiera obrazy Ubuntu, instaluje pakiety i uruchamia VM z SPICE GUI. Idealne dla deweloperów na Linuxie – VM powstaje w minuty, bez duplikowania danych.
Kluczowe komendy:
clonebox– interaktywny wizard (detect + create + start)clonebox detect– skanuje usługi/apps/ścieżkiclonebox clone . --user --run– szybki klon bieżącego katalogu z użytkownikiem i autostartemclonebox watch . --user– monitoruj na żywo aplikacje i usługi w VMclonebox repair . --user– napraw problemy z uprawnieniami, audio, usługamiclonebox container up|ps|stop|rm– lekki runtime kontenerowy (podman/docker)clonebox dashboard– lokalny dashboard (VM + containers)
Dlaczego wirtualne klony workstation mają sens?
Problem: Developerzy/Vibecoderzy nie izolują środowisk dev/test (np. dla AI agentów), bo ręczne odtwarzanie setupu to ból – godziny na instalację apps, usług, configów, dotfiles. Przechodzenie z fizycznego PC na VM wymagałoby pełnego rebuilda, co blokuje workflow.
Rozwiązanie CloneBox: Automatycznie skanuje i klonuje stan “tu i teraz” (usługi z ps, dockery z docker ps, projekty z git/.env). VM dziedziczy środowisko bez kopiowania całego śmietnika – tylko wybrane bind mounty.
Korzyści w twoim kontekście (embedded/distributed systems, AI automation):
- Sandbox dla eksperymentów: Testuj AI agenty, edge computing (RPi/ESP32 symulacje) czy Camel/ERP integracje w izolacji, bez psucia hosta.
- Reprodukcja workstation: Na firmowym PC masz setup z domu (Python/Rust/Go envs, Docker compose, Postgres dev DB) – klonujesz i pracujesz identycznie.
- Szybkość > dotfiles: Dotfiles odtwarzają configi, ale nie łapią runtime stanu (uruchomione serwery, otwarte projekty). CloneBox to “snapshot na sterydach”.
- Bezpieczeństwo/cost-optymalizacja: Izolacja od plików hosta (tylko mounts), zero downtime, tanie w zasobach (libvirt/QEMU). Dla SME: szybki onboarding dev env bez migracji fizycznej.
- AI-friendly: Agenci LLMs (jak te z twoich hobby) mogą działać w VM z pełnym kontekstem, bez ryzyka “zasmiecania” main PC.
Przykład: Masz uruchomiony Kubernetes Podman z twoim home labem + projekt automotive leasing. clonebox clone ~/projects --run → VM gotowa w 30s, z tymi samymi serwisami, ale izolowana. Lepsze niż Docker (brak GUI/full OS) czy pełna migracja.
Dlaczego ludzie tego nie robią? Brak automatyzacji – nikt nie chce ręcznie rebuildować.
- CloneBox rozwiązuje to jednym poleceniem. Super match dla twoich interesów (distributed infra, AI tools, business automation).
Installation
Quick Setup (Recommended)
Run the setup script to automatically install dependencies and configure the environment:
# Clone the repository
git clone https://github.com/wronai/clonebox.git
cd clonebox

# Run the setup script
./setup.sh
The setup script will:
- Install all required packages (QEMU, libvirt, Python, etc.)
- Add your user to the necessary groups
- Configure libvirt networks
- Install clonebox in development mode
Manual Installation
Prerequisites
# Install libvirt and QEMU/KVM
sudo apt install qemu-kvm libvirt-daemon-system libvirt-clients bridge-utils virt-manager virt-viewer

# Enable and start libvirtd
sudo systemctl enable --now libvirtd

# Add user to libvirt group
sudo usermod -aG libvirt $USER
newgrp libvirt

# Install genisoimage for cloud-init
sudo apt install genisoimage

# Install nsenter and socat for SSH port forwarding (user session mode)
sudo apt install util-linux socat
Install CloneBox
# From source
git clone https://github.com/wronai/clonebox.git
cd clonebox
pip install -e .

# Or directly
pip install clonebox
Dashboard ma opcjonalne zależności:
pip install "clonebox[dashboard]"
lub
# Aktywuj venv
source .venv/bin/activate

# Interaktywny tryb (wizard)
clonebox

# Lub poszczególne komendy
clonebox detect              # Pokaż wykryte usługi/apps/ścieżki
clonebox list                # Lista VM
clonebox create --config ... # Utwórz VM z JSON config
clonebox start <name>        # Uruchom VM
clonebox stop <name>         # Zatrzymaj VM
clonebox delete <name>       # Usuń VM
clonebox set-password <name> --password <pass>  # Ustaw hasło użytkownika VM
clonebox set-password ubuntu --password ubuntu
clonebox set-password clone-clonebox --username ubuntu --password ubuntu --user
Development and Testing
Running Tests
CloneBox has comprehensive test coverage with unit tests and end-to-end tests:
# Run unit tests only (fast, no libvirt required)
make test

# Run fast unit tests (excludes slow tests)
make test-unit

# Run end-to-end tests (requires libvirt/KVM)
make test-e2e

# Run all tests including e2e
make test-all

# Run tests with coverage
make test-cov

# Run tests with verbose output
make test-verbose
Test Categories
Tests are organized with pytest markers:
- Unit tests: Fast tests that mock libvirt/system calls (default)
- E2E tests: End-to-end tests requiring actual VM creation (marked with
@pytest.mark.e2e) - Slow tests: Tests that take longer to run (marked with
@pytest.mark.slow)
E2E tests are automatically skipped when:
- libvirt is not installed
/dev/kvmis not available- Running in CI environment (
CI=trueorGITHUB_ACTIONS=true)
Manual Test Execution
# Run only unit tests (exclude e2e)
pytest tests/ -m "not e2e"

# Run only e2e tests
pytest tests/e2e/ -m "e2e" -v

# Run specific test file
pytest tests/test_cloner.py -v

# Run with coverage
pytest tests/ -m "not e2e" --cov=clonebox --cov-report=html
Quick Start
Interactive Mode (Recommended)
Simply run clonebox to start the interactive wizard:
clonebox

clonebox clone . --user --run --replace --base-image ~/ubuntu-22.04-cloud.qcow2 --disk-size-gb 60
clonebox clone . --user --run --replace --browser-profiles chrome firefox
# Lub automatycznie (dla GUI VM wykryje i skopiuje wszystkie profile)
clonebox clone . --user --run --replace

# health check (runs all diagnostics)
bash scripts/clonebox-health-check.sh

clonebox logs . --user --all

# Validate VM internals (services/apps/smoke tests)
clonebox validate . --user

# Validate browsers with headless smoke tests + extra logs if launch fails
clonebox validate . --user --browsers-only --smoke-test

# Enhanced logs with detailed diagnostics
bash scripts/clonebox-logs-enhanced.sh . --user --all

# Comprehensive VM diagnostics
bash scripts/diagnose-vm-enhanced.sh

clonebox open . --user

# Sprawdź diagnostykę na żywo
clonebox watch . --user

clonebox test . --user --validate --require-running-apps
# Uruchom pełną walidację (wykorzystuje QGA do sprawdzenia serwisów wewnątrz)
clonebox test . --user --validate --smoke-test

clonebox sync-data . --user --only-browsers --include-cache
Profiles (Reusable presets)
Profiles pozwalają trzymać gotowe presety dla VM/container (np. ml-dev, web-dev) i nakładać je na bazową konfigurację.
# Przykład: uruchom kontener z profilem
clonebox container up . --profile ml-dev --engine podman

# Przykład: generuj VM config z profilem
clonebox clone . --profile ml-dev --user --run
Domyślne lokalizacje profili:
~/.clonebox.d/<name>.yaml./.clonebox.d/<name>.yaml- wbudowane:
src/clonebox/templates/profiles/<name>.yaml
Dashboard
clonebox dashboard --port 8080
# http://127.0.0.1:8080
The wizard will:
- Detect running services (Docker, PostgreSQL, nginx, etc.)
- Detect running applications and their working directories
- Detect project directories and config files
- Let you select what to include in the VM
- Create and optionally start the VM
Command Line
# Create VM with specific config
clonebox create --name my-dev-vm --config '{
  "paths": {
    "/home/user/projects": "/mnt/projects",
    "/home/user/.config": "/mnt/config"
  },
  "packages": ["python3", "nodejs", "docker.io"],
  "services": ["docker"]
}' --ram 4096 --vcpus 4 --disk-size-gb 20 --start

# Create VM with larger root disk
clonebox create --name my-dev-vm --disk-size-gb 30 --config '{"paths": {}, "packages": [], "services": []}'

# List VMs
clonebox list

# Start/Stop VM
clonebox start my-dev-vm
clonebox stop my-dev-vm
clonebox restart my-dev-vm

# Stop/Restart all VMs
clonebox stop --all
clonebox restart --all

# Stop VM using current directory's config
clonebox stop . --user

# Delete VM
clonebox delete my-dev-vm

# Detect system state (useful for scripting)
clonebox detect --json
Usage Examples
Basic Workflow
# 1. Clone current directory with auto-detection
clonebox clone . --user

# 2. Review generated config
cat .clonebox.yaml

# 3. Create and start VM
clonebox start . --user --viewer

# 4. Check VM status
clonebox status . --user

# 5. Open VM window later
clonebox open . --user

# 6. Stop VM when done
clonebox stop . --user

# 7. Delete VM if needed
clonebox delete . --user --yes
Development Environment with Browser Profiles
# Clone with app data (browser profiles, IDE settings)
clonebox clone . --user --run

# VM will have:
# - All your project directories
# - Browser profiles (Chrome, Firefox) with bookmarks and passwords
# - IDE settings (PyCharm, VSCode)
# - Docker containers and services

# Access in VM:
ls ~/.config/google-chrome  # Chrome profile

# Firefox profile (Ubuntu często używa snap):
ls ~/snap/firefox/common/.mozilla/firefox
ls ~/.mozilla/firefox

# PyCharm profile (snap):
ls ~/snap/pycharm-community/common/.config/JetBrains
ls ~/.config/JetBrains
Container workflow (podman/docker)
# Start a dev container (auto-detect engine if not specified)
clonebox container up . --engine podman --detach

# List running containers
clonebox container ps

# Stop/remove
clonebox container stop <name>
clonebox container rm <name>
Full validation (VM)
clonebox test weryfikuje, że VM faktycznie ma zamontowane ścieżki i spełnia wymagania z .clonebox.yaml.
clonebox test . --user --validate
Walidowane kategorie:
- Mounts (9p)
- Packages (apt)
- Snap packages
- Services (enabled + running)
- Apps (instalacja + dostępność profilu: Firefox/PyCharm/Chrome)
Testing and Validating VM Configuration
# Quick test - basic checks
clonebox test . --user --quick

# Full validation - checks EVERYTHING against YAML config
clonebox test . --user --validate

# Validation checks:
# ✅ All mount points (paths + app_data_paths) are mounted and accessible
# ✅ All APT packages are installed
# ✅ All snap packages are installed
# ✅ All services are enabled and running
# ✅ Reports file counts for each mount
# ✅ Shows package versions
# ✅ Comprehensive summary table

# Example output:
# 💾 Validating Mount Points...
# ┌─────────────────────────┬─────────┬────────────┬────────┐
# │ Guest Path              │ Mounted │ Accessible │ Files  │
# ├─────────────────────────┼─────────┼────────────┼────────┤
# │ /home/ubuntu/Downloads  │ ✅      │ ✅         │ 199    │
# │ ~/.config/JetBrains     │ ✅      │ ✅         │ 45     │
# └─────────────────────────┴─────────┴────────────┴────────┘
# 12/14 mounts working
#
# 📦 Validating APT Packages...
# ┌─────────────────┬──────────────┬────────────┐
# │ Package         │ Status       │ Version    │
# ├─────────────────┼──────────────┼────────────┤
# │ firefox         │ ✅ Installed │ 122.0+b... │
# │ docker.io       │ ✅ Installed │ 24.0.7-... │
# └─────────────────┴──────────────┴────────────┘
# 8/8 packages installed
#
# 📊 Validation Summary
# ┌────────────────┬────────┬────────┬───────┐
# │ Category       │ Passed │ Failed │ Total │
# ├────────────────┼────────┼────────┼───────┤
# │ Mounts         │ 12     │ 2      │ 14    │
# │ APT Packages   │ 8      │ 0      │ 8     │
# │ Snap Packages  │ 2      │ 0      │ 2     │
# │ Services       │ 5      │ 1      │ 6     │
# │ TOTAL          │ 27     │ 3      │ 30    │
# └────────────────┴────────┴────────┴───────┘
VM Health Monitoring and Mount Validation
# Check overall status including mount validation
clonebox status . --user

# Output shows:
# 📊 VM State: running
# 🔍 Network and IP address
# ☁️ Cloud-init: Complete
# 💾 Mount Points status table:
#    ┌─────────────────────────┬──────────────┬────────┐
#    │ Guest Path              │ Status       │ Files  │
#    ├─────────────────────────┼──────────────┼────────┤
#    │ /home/ubuntu/Downloads  │ ✅ Mounted   │ 199    │
#    │ /home/ubuntu/Documents  │ ❌ Not mounted│ ?     │
#    │ ~/.config/JetBrains     │ ✅ Mounted   │ 45     │
#    └─────────────────────────┴──────────────┴────────┘
#    12/14 mounts active
# 🏥 Health Check Status: OK

# Trigger full health check
clonebox status . --user --health

# If mounts are missing, remount or rebuild:
# In VM: sudo mount -a
# Or rebuild: clonebox clone . --user --run --replace
📊 Monitoring and Self-Healing
CloneBox includes continuous monitoring and automatic self-healing capabilities for both GUI applications and system services.
Monitor Running Applications and Services
# Watch real-time status of apps and services
clonebox watch . --user

# Output shows live dashboard:
# ╔══════════════════════════════════════════════════════════╗
# ║                   CloneBox Live Monitor                  ║
# ╠══════════════════════════════════════════════════════════╣
# ║ 🖥️  GUI Apps:                                              ║
# ║   ✅ pycharm-community    PID: 1234   Memory: 512MB       ║
# ║   ✅ firefox             PID: 5678   Memory: 256MB       ║
# ║   ❌ chromium            Not running                    ║
# ║                                                          ║
# ║ 🔧 System Services:                                       ║
# ║   ✅ docker              Active: 2h 15m                ║
# ║   ✅ nginx               Active: 1h 30m                ║
# ║   ✅ uvicorn             Active: 45m (port 8000)       ║
# ║                                                          ║
# ║ 📊 Last check: 2024-01-31 13:25:30                       ║
# ║ 🔄 Next check in: 25 seconds                             ║
# ╚══════════════════════════════════════════════════════════╝

# Check detailed status with logs
clonebox status . --user --verbose

# View monitor logs from host
./scripts/clonebox-logs.sh  # Interactive log viewer
# Or via SSH:
ssh ubuntu@<IP_VM> "tail -f /var/log/clonebox-monitor.log"
Repair and Troubleshooting
# Run automatic repair from host
clonebox repair . --user

# This triggers the repair script inside VM which:
# - Fixes directory permissions (pulse, ibus, dconf)
# - Restarts audio services (PulseAudio/PipeWire)
# - Reconnects snap interfaces
# - Remounts missing filesystems
# - Resets GNOME keyring if needed

# Interactive repair menu (via SSH)
ssh ubuntu@<IP_VM> "clonebox-repair"

# Manual repair options from host:
clonebox repair . --user --auto      # Full automatic repair
clonebox repair . --user --perms     # Fix permissions only
clonebox repair . --user --audio     # Fix audio only
clonebox repair . --user --snaps     # Reconnect snaps only
clonebox repair . --user --mounts    # Remount filesystems only

# Check repair status (via SSH)
ssh ubuntu@<IP_VM> "cat /var/run/clonebox-status"

# View repair logs
./scripts/clonebox-logs.sh  # Interactive viewer
# Or via SSH:
ssh ubuntu@<IP_VM> "tail -n 50 /var/log/clonebox-boot.log"
Monitor Configuration
The monitoring system is configured through environment variables in .env:
# Enable/disable monitoring
CLONEBOX_ENABLE_MONITORING=true
CLONEBOX_MONITOR_INTERVAL=30      # Check every 30 seconds
CLONEBOX_AUTO_REPAIR=true         # Auto-restart failed services
CLONEBOX_WATCH_APPS=true          # Monitor GUI apps
CLONEBOX_WATCH_SERVICES=true      # Monitor system services
Inside the VM - Manual Controls
# Check monitor service status
systemctl --user status clonebox-monitor

# View monitor logs
journalctl --user -u clonebox-monitor -f
tail -f /var/log/clonebox-monitor.log

# Stop/start monitoring
systemctl --user stop clonebox-monitor
systemctl --user start clonebox-monitor

# Check last status
cat /var/run/clonebox-monitor-status

# Run repair manually
clonebox-repair --all             # Run all fixes
clonebox-repair --status          # Show current status
clonebox-repair --logs            # Show recent logs
Export/Import Workflow
# On workstation A - Export VM with all data
clonebox export . --user --include-data -o my-dev-env.tar.gz

# Transfer file to workstation B, then import
clonebox import my-dev-env.tar.gz --user

# Start VM on new workstation
clonebox start . --user
clonebox open . --user

# VM includes:
# - Complete disk image
# - All browser profiles and settings
# - Project files
# - Docker images and containers
Troubleshooting Common Issues
# If mounts are empty after reboot:
clonebox status . --user  # Check VM status
# Then in VM:
sudo mount -a              # Remount all fstab entries

# If browser profiles don't sync:
rm .clonebox.yaml
clonebox clone . --user --run --replace

# If GUI doesn't open:
clonebox open . --user     # Easiest way
# or:
virt-viewer --connect qemu:///session clone-clonebox

# Check VM details:
clonebox list              # List all VMs
virsh --connect qemu:///session dominfo clone-clonebox

# Restart VM if needed:
clonebox restart . --user  # Easiest - stop and start
clonebox stop . --user && clonebox start . --user  # Manual restart
clonebox restart . --user --open  # Restart and open GUI
virsh --connect qemu:///session reboot clone-clonebox  # Direct reboot
virsh --connect qemu:///session reset clone-clonebox  # Hard reset if frozen
Legacy Examples (Manual Config)
These examples use the older create command with manual JSON config. For most users, the clone command with auto-detection is easier.
Python Development Environment
clonebox create --name python-dev --config '{
  "paths": {
    "/home/user/my-python-project": "/workspace",
    "/home/user/.pyenv": "/root/.pyenv"
  },
  "packages": ["python3", "python3-pip", "python3-venv", "build-essential"],
  "services": []
}' --ram 2048 --start
Docker Development
clonebox create --name docker-dev --config '{
  "paths": {
    "/home/user/docker-projects": "/projects",
    "/var/run/docker.sock": "/var/run/docker.sock"
  },
  "packages": ["docker.io", "docker-compose"],
  "services": ["docker"]
}' --ram 4096 --start
Full Stack (Node.js + PostgreSQL)
clonebox create --name fullstack --config '{
  "paths": {
    "/home/user/my-app": "/app",
    "/home/user/pgdata": "/var/lib/postgresql/data"
  },
  "packages": ["nodejs", "npm", "postgresql"],
  "services": ["postgresql"]
}' --ram 4096 --vcpus 4 --start
Inside the VM
After the VM boots, shared directories are automatically mounted via fstab entries. You can check their status:
# Check mount status
mount | grep 9p

# View health check report
cat /var/log/clonebox-health.log

# Re-run health check manually
clonebox-health

# Check cloud-init status
sudo cloud-init status

# Manual mount (if needed)
sudo mkdir -p /mnt/projects
sudo mount -t 9p -o trans=virtio,version=9p2000.L,nofail mount0 /mnt/projects
Health Check System
CloneBox includes automated health checks that verify:
- Package installation (apt/snap)
- Service status
- Mount points accessibility
- GUI readiness
Health check logs are saved to /var/log/clonebox-health.log with a summary in /var/log/clonebox-health-status.
Architecture
┌────────────────────────────────────────────────────────┐
│                     HOST SYSTEM                        │
│  ┌──────────────┐  ┌──────────────┐  ┌──────────────┐  │
│  │ /home/user/  │  │  /var/www/   │  │   Docker     │  │
│  │  projects/   │  │    html/     │  │   Socket     │  │
│  └──────┬───────┘  └──────┬───────┘  └──────┬───────┘  │
│         │                 │                 │          │
│         │    9p/virtio    │                 │          │
│         │   bind mounts   │                 │          │
│  ┌──────▼─────────────────▼─────────────────▼───────┐  │
│  │               CloneBox VM                        │  │
│  │  ┌────────────┐ ┌────────────┐ ┌────────────┐    │  │
│  │  │ /mnt/proj  │ │ /mnt/www   │ │ /var/run/  │    │  │
│  │  │            │ │            │ │ docker.sock│    │  │
│  │  └────────────┘ └────────────┘ └────────────┘    │  │
│  │                                                  │  │
│  │  cloud-init installed packages & services        │  │
│  └──────────────────────────────────────────────────┘  │
└────────────────────────────────────────────────────────┘
Quick Clone (Recommended)
The fastest way to clone your current working directory:
# Clone current directory - generates .clonebox.yaml and asks to create VM
# Base OS image is automatically downloaded to ~/Downloads on first run
clonebox clone .

# Increase VM disk size (recommended for GUI + large tooling)
clonebox clone . --user --disk-size-gb 30

# Clone specific path
clonebox clone ~/projects/my-app

# Clone with custom name and auto-start
clonebox clone ~/projects/my-app --name my-dev-vm --run

# Clone and edit config before creating
clonebox clone . --edit

# Replace existing VM (stops, deletes, and recreates)
clonebox clone . --replace

# Use custom base image instead of auto-download
clonebox clone . --base-image ~/ubuntu-22.04-cloud.qcow2

# User session mode (no root required)
clonebox clone . --user
Later, start the VM from any directory with .clonebox.yaml:
# Start VM from config in current directory
clonebox start .

# Start VM from specific path
clonebox start ~/projects/my-app
Export YAML Config
# Export detected state as YAML (with deduplication)
clonebox detect --yaml --dedupe

# Save to file
clonebox detect --yaml --dedupe -o my-config.yaml
Base Images
CloneBox automatically downloads a bootable Ubuntu cloud image on first run:
# Auto-download (default) - downloads Ubuntu 22.04 to ~/Downloads on first run
clonebox clone .

# Use custom base image
clonebox clone . --base-image ~/my-custom-image.qcow2

# Manual download (optional - clonebox does this automatically)
wget -O ~/Downloads/clonebox-ubuntu-jammy-amd64.qcow2 \
  https://cloud-images.ubuntu.com/jammy/current/jammy-server-cloudimg-amd64.img
Base image behavior:
- If no
--base-imageis specified, Ubuntu 22.04 cloud image is auto-downloaded - Downloaded images are cached in
~/Downloads/clonebox-ubuntu-jammy-amd64.qcow2 - Subsequent VMs reuse the cached image (no re-download)
- Each VM gets its own disk using the base image as a backing file (copy-on-write)
VM Login Credentials
VM credentials are managed through .env file for security:
Setup:
- Copy
.env.exampleto.env:cp .env.example .env - Edit
.envand set your password:# .env file VM_PASSWORD=your_secure_password VM_USERNAME=ubuntu - The
.clonebox.yamlfile references the password from.env:vm: username: ubuntu password: ${VM_PASSWORD} # Loaded from .env
Default credentials (if .env not configured):
- Username:
ubuntu - Password:
ubuntu
Security notes:
.envis automatically gitignored (never committed)- Username is stored in YAML (not sensitive)
- Password is stored in
.env(sensitive, not committed) - Change password after first login:
passwd - User has passwordless sudo access
User Session & Networking
CloneBox supports creating VMs in user session (no root required) with automatic network fallback:
# Create VM in user session (uses ~/.local/share/libvirt/images)
clonebox clone . --user

# Explicitly use user-mode networking (slirp) - works without libvirt network
clonebox clone . --user --network user

# Force libvirt default network (may fail in user session)
clonebox clone . --network default

# Auto mode (default): tries libvirt network, falls back to user-mode if unavailable
clonebox clone . --network auto
Network modes:
auto(default): Uses libvirt default network if available, otherwise falls back to user-mode (slirp)default: Forces use of libvirt default networkuser: Uses user-mode networking (slirp) - no bridge setup required
Commands Reference
| Command | Description |
|---|---|
clonebox |
Interactive VM creation wizard |
clonebox clone <path> |
Generate .clonebox.yaml from path + running processes |
clonebox clone . --run |
Clone and immediately start VM |
clonebox clone . --edit |
Clone, edit config, then create |
clonebox clone . --replace |
Replace existing VM (stop, delete, recreate) |
clonebox clone . --user |
Clone in user session (no root) |
clonebox clone . --base-image <path> |
Use custom base image |
clonebox clone . --disk-size-gb <gb> |
Set root disk size in GB (generated configs default to 20GB) |
clonebox clone . --network user |
Use user-mode networking (slirp) |
clonebox clone . --network auto |
Auto-detect network mode (default) |
clonebox create --config <json> --disk-size-gb <gb> |
Create VM from JSON config with specified disk size |
clonebox start . |
Start VM from .clonebox.yaml in current dir |
clonebox start . --viewer |
Start VM and open GUI window |
clonebox start <name> |
Start existing VM by name |
clonebox stop . |
Stop VM from .clonebox.yaml in current dir |
clonebox stop . -f |
Force stop VM |
clonebox stop --all |
Stop all running VMs in both user and system sessions |
clonebox restart <name> |
Restart VM (stop and start) |
clonebox restart --all |
Restart all VMs in both user and system sessions |
clonebox delete . |
Delete VM from .clonebox.yaml in current dir |
clonebox delete . --yes |
Delete VM without confirmation |
clonebox list |
List all VMs |
clonebox detect |
Show detected services/apps/paths |
clonebox detect --yaml |
Output as YAML config |
clonebox detect --yaml --dedupe |
YAML with duplicates removed |
clonebox detect --json |
Output as JSON |
clonebox container up . |
Start a dev container for given path |
clonebox container ps |
List containers |
clonebox container stop <name> |
Stop a container |
clonebox container rm <name> |
Remove a container |
clonebox dashboard |
Run local dashboard (VM + containers) |
clonebox status . --user |
Check VM health, cloud-init, IP, and mount status |
clonebox status . --user --health |
Check VM status and run full health check |
clonebox test . --user |
Test VM configuration (basic checks) |
clonebox test . --user --validate |
Full validation: mounts, packages, services vs YAML |
clonebox export . --user |
Export VM for migration to another workstation |
clonebox export . --user --include-data |
Export VM with browser profiles and configs |
clonebox import archive.tar.gz --user |
Import VM from export archive |
clonebox open . --user |
Open GUI viewer for VM (same as virt-viewer) |
virt-viewer --connect qemu:///session <vm> |
Open GUI for running VM |
virsh --connect qemu:///session console <vm> |
Open text console (Ctrl+] to exit) |
Requirements
- Linux with KVM support (
/dev/kvm) - libvirt daemon running
- Python 3.8+
- User in
libvirtgroup
Troubleshooting
Critical: Insufficient Disk Space
If you install a full desktop environment and large development tools (e.g. ubuntu-desktop-minimal, docker.io, large snaps like pycharm-community/chromium), you may hit low disk space warnings inside the VM.
Recommended fix:
- Set a larger root disk in
.clonebox.yaml:
vm:
  disk_size_gb: 30
You can also set it during config generation:
clonebox clone . --user --disk-size-gb 30
Notes:
- New configs generated by
clonebox clonedefault todisk_size_gb: 20. - You can override this by setting
vm.disk_size_gbin.clonebox.yaml.
Workaround for an existing VM (host-side resize + guest filesystem grow):
clonebox stop . --user
qemu-img resize ~/.local/share/libvirt/images/<vm-name>/root.qcow2 +10G
clonebox start . --user
Inside the VM:
sudo growpart /dev/vda 1
sudo resize2fs /dev/vda1
df -h /
Known Issue: IBus Preferences crash
During validation you may occasionally see a crash dialog from IBus Preferences in the Ubuntu desktop environment.
This is an upstream issue related to the input method daemon (ibus-daemon) and obsolete system packages (e.g. libglib2.0, libssl3, libxml2, openssl).
It does not affect CloneBox functionality and the VM operates normally.
Workaround:
- Dismiss the crash dialog
- Or run
sudo apt upgradeinside the VM to update system packages
Snap Apps Not Launching (PyCharm, Chromium, Firefox)
If snap-installed applications (e.g., PyCharm, Chromium) are installed but don’t launch when clicked, the issue is usually disconnected snap interfaces. This happens because snap interfaces are not auto-connected when installing via cloud-init.
New VMs created with updated CloneBox automatically connect snap interfaces, but for older VMs or manual installs:
# Check snap interface connections
snap connections pycharm-community

# If you see "-" instead of ":desktop", interfaces are NOT connected

# Connect required interfaces
sudo snap connect pycharm-community:desktop :desktop
sudo snap connect pycharm-community:desktop-legacy :desktop-legacy
sudo snap connect pycharm-community:x11 :x11
sudo snap connect pycharm-community:wayland :wayland
sudo snap connect pycharm-community:home :home
sudo snap connect pycharm-community:network :network

# Restart snap daemon and try again
sudo systemctl restart snapd
snap run pycharm-community
For Chromium/Firefox:
sudo snap connect chromium:desktop :desktop
sudo snap connect chromium:x11 :x11
sudo snap connect firefox:desktop :desktop
sudo snap connect firefox:x11 :x11
Debug launch:
PYCHARM_DEBUG=true snap run pycharm-community 2>&1 | tee /tmp/pycharm-debug.log
Nuclear option (reinstall):
snap remove pycharm-community
rm -rf ~/snap/pycharm-community
sudo snap install pycharm-community --classic
sudo snap connect pycharm-community:desktop :desktop
Network Issues
If you encounter “Network not found” or “network ‘default’ is not active” errors:
# Option 1: Use user-mode networking (no setup required)
clonebox clone . --user --network user

# Option 2: Run the network fix script
./fix-network.sh

# Or manually fix:
virsh --connect qemu:///session net-destroy default 2>/dev/null
virsh --connect qemu:///session net-undefine default 2>/dev/null
virsh --connect qemu:///session net-define /tmp/default-network.xml
virsh --connect qemu:///session net-start default
Permission Issues
If you get permission errors:
# Ensure user is in libvirt and kvm groups
sudo usermod -aG libvirt $USER
sudo usermod -aG kvm $USER

# Log out and log back in for groups to take effect
VM Already Exists
If you get “VM already exists” error:
# Option 1: Use --replace flag to automatically replace it
clonebox clone . --replace

# Option 2: Delete manually first
clonebox delete <vm-name>

# Option 3: Use virsh directly
virsh --connect qemu:///session destroy <vm-name>
virsh --connect qemu:///session undefine <vm-name>

# Option 4: Start the existing VM instead
clonebox start <vm-name>
virt-viewer not found
If GUI doesn’t open:
# Install virt-viewer
sudo apt install virt-viewer

# Then connect manually
virt-viewer --connect qemu:///session <vm-name>
Browser Profiles and PyCharm Not Working
If browser profiles or PyCharm configs aren’t available, or you get permission errors:
Root cause: VM was created with old version without proper mount permissions.
Solution - Rebuild VM with latest fixes:
# Stop and delete old VM
clonebox stop . --user
clonebox delete . --user --yes

# Recreate VM with fixed permissions and app data mounts
clonebox clone . --user --run --replace
After rebuild, verify mounts in VM:
# Check all mounts are accessible
ls ~/.config/google-chrome      # Chrome profile
ls ~/.mozilla/firefox           # Firefox profile
ls ~/.config/JetBrains         # PyCharm settings
ls ~/Downloads                 # Downloads folder
ls ~/Documents                 # Documents folder
What changed in v0.1.12:
- All mounts use
uid=1000,gid=1000for ubuntu user access - Both
pathsandapp_data_pathsare properly mounted - No sudo needed to access any shared directories
Mount Points Empty or Permission Denied
If you get “must be superuser to use mount” error when accessing Downloads/Documents:
Solution: VM was created with old mount configuration. Recreate VM:
# Stop and delete old VM
clonebox stop . --user
clonebox delete . --user --yes

# Recreate with fixed permissions
clonebox clone . --user --run --replace
What was fixed:
- Mounts now use
uid=1000,gid=1000so ubuntu user has access - No need for sudo to access shared directories
- Applies to new VMs created after v0.1.12
Mount Points Empty After Reboot
If shared directories appear empty after VM restart:
- Check fstab entries:
cat /etc/fstab | grep 9p - Mount manually:
sudo mount -a - Verify access mode:
- VMs created with
accessmode="mapped"allow any user to access mounts - Mount options include
uid=1000,gid=1000for user access
- VMs created with
Enhanced Logging and Diagnostics
CloneBox provides enhanced logging and diagnostic tools for deep troubleshooting and monitoring.
Quick Health Check (Recommended First Step)
For a comprehensive analysis of your VM’s health, run the unified health check:
# Run complete health check (recommended)
clonebox-health-check.sh

# With specific VM name
clonebox-health-check.sh my-vm-name

# Health check generates:
# - Summary report with overall status
# - Detailed issues list with solutions
# - Full diagnostic output
# - All logs collected in one place
The health check automatically:
- ✅ Verifies VM is running and responsive
- ✅ Tests network connectivity (SSH, display ports)
- ✅ Checks QEMU Guest Agent functionality
- ✅ Analyzes service status (SSH, Docker, GDM, etc.)
- ✅ Monitors cloud-init progress
- ✅ Evaluates resource usage (CPU, memory, disk)
- ✅ Runs all enhanced diagnostic tools
- ✅ Collects and analyzes logs for errors
- ✅ Generates actionable recommendations
Understanding Health Check Output
HEALTH CHECK COMPLETE
=====================

✓ VM is HEALTHY - No issues detected!      # All good
⚠ VM is operational with 2 warning(s)     # Minor issues
✗ VM has 1 critical issue(s) and 2 warning(s)  # Problems found

Report saved to: ~/.local/share/clonebox/reports/clone-clonebox-health-20240206-112233
Summary: ~/.local/share/clonebox/reports/clone-clonebox-health-20240206-112233/summary.txt
Issues: ~/.local/share/clonebox/reports/clone-clonebox-health-20240206-112233/issues.txt
Enhanced Log Viewer
The enhanced log viewer provides comprehensive log access with additional diagnostics:
# Interactive enhanced log viewer
clonebox-logs-enhanced.sh . --user

# Show all logs at once
clonebox-logs-enhanced.sh . --user --all

# Follow live logs (like tail -f)
clonebox-logs-enhanced.sh . --user --follow
Features:
- Multiple log sources: Boot logs, monitor logs, cloud-init logs, system logs
- Service status: Real-time status of key services (SSH, Docker, GDM, QEMU Guest Agent)
- Error filtering: View only error messages from all logs
- Performance metrics: CPU, memory, and disk usage statistics
- Network diagnostics: Interface configuration, routing, DNS
- Export capability: Save all logs to a compressed archive
- Live monitoring: Follow logs in real-time
Comprehensive VM Diagnostics
The enhanced diagnostic script performs a thorough VM health check:
# Run comprehensive diagnostics
bash scripts/diagnose-vm-enhanced.sh

# Diagnostic report is saved to: <vm-name>-diagnostic-<timestamp>.txt
Diagnostic categories:
- VM Status: State, CPU, memory, autostart settings
- Network Analysis: Port forwarding, passt process, connectivity tests
- SSH Configuration: Key permissions, port status, connection testing
- QEMU Guest Agent: Responsiveness, guest OS info, time sync
- Serial Log Analysis: Boot timeline, cloud-init progress, errors
- Performance: Host and VM resource utilization
- GUI Environment: Desktop status, display server, graphics ports
- Security: SSH key encryption, network isolation
Log Sources
The enhanced logging system collects from multiple sources:
VM Internal Logs
/var/log/clonebox-boot.log- CloneBox boot process/var/log/clonebox-monitor.log- Service monitoring/var/log/cloud-init-output.log- Cloud-init installation output/var/log/cloud-init.log- Detailed cloud-init logs/var/log/syslog- System logs
Diagnostic Information
- Cloud-init status (JSON format)
- Service status for critical components
- Recent error messages from journalctl
- Disk usage and large directories
- Network configuration and routes
- Performance metrics (load, memory, processes)
Using Logs for Troubleshooting
Check Cloud-init Progress
# Quick check
clonebox-logs-enhanced.sh . --user | grep -E "(running|done|error)"

# Detailed cloud-init status
clonebox-logs-enhanced.sh . --user
# Select option 3 for cloud-init output log
Identify Service Failures
# View service status
clonebox-logs-enhanced.sh . --user
# Select option 6 for service status

# View only errors
clonebox-logs-enhanced.sh . --user
# Select option 7 for recent errors
Performance Issues
# Check performance metrics
clonebox-logs-enhanced.sh . --user
# Select option 8 for performance metrics

# Full diagnostic report
bash scripts/diagnose-vm-enhanced.sh
# Check the "Performance Analysis" section
Network Problems
# Network diagnostics
clonebox-logs-enhanced.sh . --user
# Select option 9 for network configuration

# Full network analysis
bash scripts/diagnose-vm-enhanced.sh
# Check the "Network Deep Analysis" section
Exporting Logs
For sharing or offline analysis:
# Export all logs to archive
clonebox-logs-enhanced.sh . --user
# Select option 12 to export

# Export diagnostic report
bash scripts/diagnose-vm-enhanced.sh
# Report automatically saved to <vm-name>-diagnostic-<timestamp>.txt
Integration with CloneBox Commands
The enhanced logging integrates with standard CloneBox commands. Recommended workflow:
# 1. After VM creation, run health check
clonebox-health-check.sh

# 2. If issues found, review them
cat ~/.local/share/clonebox/reports/*/issues.txt

# 3. Auto-repair if needed
clonebox repair . --user --auto

# 4. Re-check health
clonebox-health-check.sh

# 5. For ongoing monitoring
clonebox watch . --user

# 6. For detailed log analysis
clonebox-logs-enhanced.sh . --user --all

# 7. Full validation test
clonebox test . --user --validate --smoke-test
Quick reference:
# Standard logs (basic)
clonebox logs . --user --all

# Enhanced logs (detailed)
clonebox-logs-enhanced.sh . --user --all

# Complete health analysis
clonebox-health-check.sh

# Live monitoring
clonebox watch . --user

# Health check with diagnostics
bash scripts/diagnose-vm-enhanced.sh
Advanced Usage
VM Migration Between Workstations
Export your complete VM environment:
# Export VM with all data
clonebox export . --user --include-data -o my-dev-env.tar.gz

# Transfer to new workstation, then import
clonebox import my-dev-env.tar.gz --user
clonebox start . --user
Testing VM Configuration
Validate your VM setup:
# Quick test (basic checks)
clonebox test . --user --quick

# Full test (includes health checks)
clonebox test . --user --verbose
Monitoring VM Health
Check VM status from workstation:
# Check VM state, IP, cloud-init, and health
clonebox status . --user

# Trigger health check in VM
clonebox status . --user --health
Reopening VM Window
If you close the VM window, you can reopen it:
# Open GUI viewer (easiest)
clonebox open . --user

# Start VM and open GUI (if VM is stopped)
clonebox start . --user --viewer

# Open GUI for running VM
virt-viewer --connect qemu:///session clone-clonebox

# List VMs to get the correct name
clonebox list

# Text console (no GUI)
virsh --connect qemu:///session console clone-clonebox
# Press Ctrl + ] to exit console
Exporting to Proxmox
To use CloneBox VMs in Proxmox, you need to convert the qcow2 disk image to Proxmox format.
Step 1: Locate VM Disk Image
# Find VM disk location
clonebox list

# Check VM details for disk path
virsh --connect qemu:///session dominfo clone-clonebox

# Typical locations:
# User session: ~/.local/share/libvirt/images/<vm-name>/<vm-name>.qcow2
# System session: /var/lib/libvirt/images/<vm-name>/<vm-name>.qcow2
Step 2: Export VM with CloneBox
# Export VM with all data (from current directory with .clonebox.yaml)
clonebox export . --user --include-data -o clonebox-vm.tar.gz

# Or export specific VM by name
clonebox export safetytwin-vm --include-data -o safetytwin.tar.gz

# Extract to get the disk image
tar -xzf clonebox-vm.tar.gz
cd clonebox-clonebox
ls -la  # Should show disk.qcow2, vm.xml, etc.
Step 3: Convert to Proxmox Format
# Install qemu-utils if not installed
sudo apt install qemu-utils

# Convert qcow2 to raw format (Proxmox preferred)
qemu-img convert -f qcow2 -O raw disk.qcow2 vm-disk.raw

# Or convert to qcow2 with compression for smaller size
qemu-img convert -f qcow2 -O qcow2 -c disk.qcow2 vm-disk-compressed.qcow2
Step 4: Transfer to Proxmox Host
# Using scp (replace with your Proxmox host IP)
scp vm-disk.raw root@proxmox:/var/lib/vz/template/iso/

# Or using rsync for large files
rsync -avh --progress vm-disk.raw root@proxmox:/var/lib/vz/template/iso/
Step 5: Create VM in Proxmox
-
Log into Proxmox Web UI
- Create new VM:
- Click “Create VM”
- Enter VM ID and Name
- Set OS: “Do not use any media”
- Configure Hardware:
- Hard Disk:
- Delete default disk
- Click “Add” → “Hard Disk”
- Select your uploaded image file
- Set Disk size (can be larger than image)
- Set Bus: “VirtIO SCSI”
- Set Cache: “Write back” for better performance
- Hard Disk:
- CPU & Memory:
- Set CPU cores (match original VM config)
- Set Memory (match original VM config)
- Network:
- Set Model: “VirtIO (paravirtualized)”
- Confirm: Click “Finish” to create VM
Step 6: Post-Import Configuration
-
Start the VM in Proxmox
- Update network configuration:
# In VM console, update network interfaces sudo nano /etc/netplan/01-netcfg.yaml # Example for Proxmox bridge: network: version: 2 renderer: networkd ethernets: ens18: # Proxmox typically uses ens18 dhcp4: true - Apply network changes:
sudo netplan apply - Update mount points (if needed):
# Mount points will fail in Proxmox, remove them
sudo nano /etc/fstab
# Comment out or remove 9p mount entries

# Reboot to apply changes
sudo reboot
Alternative: Direct Import to Proxmox Storage
If you have Proxmox with shared storage:
# On Proxmox host
# Create a temporary directory
mkdir /tmp/import

# Copy disk directly to Proxmox storage (example for local-lvm)
scp vm-disk.raw root@proxmox:/tmp/import/

# On Proxmox host, create VM using CLI
qm create 9000 --name clonebox-vm --memory 4096 --cores 4 --net0 virtio,bridge=vmbr0

# Import disk to VM
qm importdisk 9000 /tmp/import/vm-disk.raw local-lvm

# Attach disk to VM
qm set 9000 --scsihw virtio-scsi-pci --scsi0 local-lvm:vm-9000-disk-0

# Set boot disk
qm set 9000 --boot c --bootdisk scsi0
Troubleshooting
- VM won’t boot: Check if disk format is compatible (raw is safest)
- Network not working: Update network configuration for Proxmox’s NIC naming
- Performance issues: Use VirtIO drivers and set cache to “Write back”
- Mount errors: Remove 9p mount entries from /etc/fstab as they won’t work in Proxmox
Notes
- CloneBox’s bind mounts (9p filesystem) are specific to libvirt/QEMU and won’t work in Proxmox
- Browser profiles and app data exported with
--include-datawill be available in the VM disk - For shared folders in Proxmox, use Proxmox’s shared folders or network shares instead
License
Apache License - see LICENSE file.