wrd
WRD (WRonai Development)
A powerful workflow automation tool for developers
[](https://pypi.org/project/wrd/) [](https://www.python.org/) [](LICENSE) [Documentation](https://wronai.github.io/wrd) | [Examples](https://github.com/wronai/wrd/tree/main/examples) | [Report Bug](https://github.com/wronai/wrd/issues)🚀 Features
- Project Templates: Quickly bootstrap projects with pre-configured templates
- Interactive Shell: User-friendly command-line interface with rich menus
- Multi-language Support: Works with Python, JavaScript, and more
- Customizable: Create and share your own templates
- PWA Support: Generate single-file Progressive Web Apps
- Git Integration: Automatic Git repository initialization
- Configuration: Simple YAML-based configuration
- Claude Code Integration: Seamless integration with Claude Code AI assistant
Features
- 🚀 Project Management: Create and manage projects with a single command
- 📝 Automatic Documentation: Generate and maintain project documentation
- 🤖 AI Integration: Optimized for working with AI coding assistants
- 🔄 Workflow Automation: Automate repetitive tasks
- ⏱️ Session Monitoring: Track your coding sessions
- 💾 Backup System: Keep your work safe with automated backups
- 📊 Progress Tracking: Monitor your project’s progress
Installation
Prerequisites
- Python 3.8 or higher
- Git
- pip (Python package manager)
Using pip (recommended)
pip install wrd-tool
From source
# Clone the repository
git clone https://github.com/wronai/wrd.git
cd wrd

# Install in development mode
pip install -e .
Quick Start
Create a new project
wrd create my-awesome-project --type python --description "My awesome project"
List all projects
wrd list
Update project progress
wrd progress my-awesome-project "Initial setup complete"
Create a backup
wrd backup
Project Structure
When you create a new project, the following structure is generated:
my-awesome-project/
├── .git/
├── .gitignore
├── README.md
├── CLAUDE.md
├── requirements.txt
├── src/
│   └── __init__.py
├── tests/
│   └── __init__.py
└── .wrd/
    └── config.json
🖥️ Command Line Interface (CLI)
WRD provides a powerful command-line interface for managing projects and interacting with Claude AI. The CLI is containerized using Docker for consistency across environments.
Key Features
- Interactive shell with Claude AI integration
- Project scaffolding and management
- Template-based project generation
- Seamless integration with the Anthropic SDK
Getting Started
- Prerequisites:
- Docker and Docker Compose
- Anthropic API key
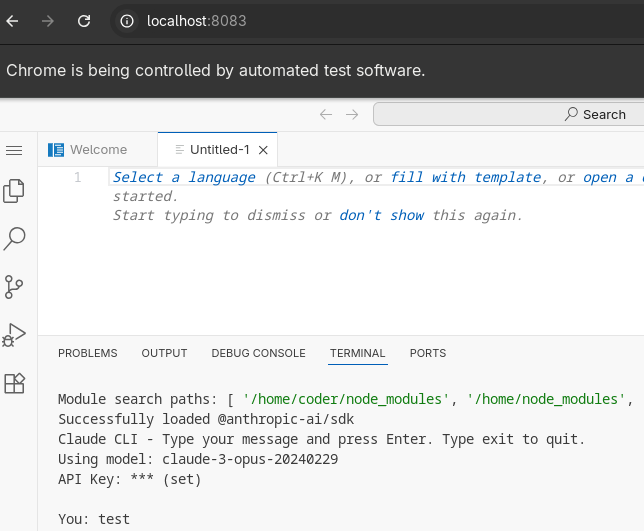
- Start the CLI:
./cli/claude-code.sh - Example Usage:
// In the Node.js REPL
const { Anthropic } = require('@anthropic-ai/sdk');
const anthropic = new Anthropic({ apiKey: process.env.ANTHROPIC_API_KEY });

// Start a conversation with Claude
const response = await anthropic.messages.create({
  model: 'claude-3-opus-20240229',
  max_tokens: 1000,
  messages: [{ role: 'user', content: 'Hello, Claude!' }]
});
For detailed CLI documentation, see the CLI Documentation.
🐳 Docker Setup (Recommended)
For an isolated development environment, you can use Docker to run WRD with Claude Code:
Prerequisites
- Docker and Docker Compose
- At least 2GB of free disk space
Quick Start
- Clone the repository (if not already done):
git clone https://github.com/wronai/wrd.git cd wrd - Start the container:
./cli/claude-code.sh - If you encounter disk space issues, try cleaning up Docker resources:
# Clean up unused containers and images docker system prune -a # Check disk usage docker system df # Remove all unused volumes (be careful, this will delete all unused volumes) docker volume prune - For persistent storage issues, you can configure Docker to use a different storage location:
# Stop Docker
sudo systemctl stop docker

# Edit Docker daemon configuration
sudo nano /etc/docker/daemon.json
Add or modify the following (replace
/path/to/with/spacewith your desired location):{ "data-root": "/path/to/with/space/docker" }Then restart Docker:
sudo systemctl start docker
🤖 Claude Code Integration
WRD works seamlessly with Claude Code, an AI coding assistant. Follow these steps to set up Claude Code with WRD:
Quick Setup
- Install Claude Code globally:
npm install -g @anthropic-ai/claude-code - Authenticate with your preferred method:
- Anthropic Console (requires billing)
- Claude Pro/Max subscription
- Enterprise platforms (Bedrock/Vertex AI)
- Initialize a new project with WRD and Claude Code:
wrd create my-ai-project --type python cd my-ai-project claude - Use the
/initcommand in the Claude Code interface to generate project-specific documentation.
For detailed installation instructions, troubleshooting, and advanced configuration, see our Claude Code Setup Guide.
Documentation
For detailed documentation, please visit our documentation site.
Contributing
Contributions are welcome! Please read our contributing guidelines before submitting pull requests.
- Fork the repository
- Create a feature branch (
git checkout -b feature/amazing-feature) - Commit your changes (
git commit -m 'Add some amazing feature') - Push to the branch (
git push origin feature/amazing-feature) - Open a Pull Request
License
This project is licensed under the Apache License 2.0 - see the LICENSE file for details.
Support
For support, please open an issue in the issue tracker.
Acknowledgments
- Inspired by Claude Code workflow
- Built with ❤️ by the Tom Sapletta
📦 Features
- Project Management: Create and manage projects with a single command
- Automatic Documentation: Generate and maintain project documentation
- Workflow Automation: Automate repetitive tasks
- Session Monitoring: Track your coding sessions
- Backup System: Keep your work safe with automated backups
🚀 Installation
Prerequisites
- Python 3.8 or higher
- Git
- pip (Python package manager)
Quick Start
- Clone the repository:
git clone https://github.com/wronai/wrd.git cd wrd - Set up a virtual environment (recommended):
python -m venv venv source venv/bin/activate # On Windows: venv\Scripts\activate - Install in development mode:
pip install -e . - Verify installation:
wrd --help
🛠 Usage
Basic Commands
# Show help
wrd --help

# Create a new project
wrd create my-project --description "My awesome project"

# List all projects
wrd list

# Show project status
wrd status

# Update project progress
wrd progress my-project "Initial setup complete"

# Create a backup
wrd backup
Creating a New Project
# Create a new Python project
wrd create my-python-project --type python --description "My Python project"

# Create a new web project
wrd create my-web-project --type web --description "My Web project"
Project Structure
When you create a new project, the following structure is generated:
my-project/
├── .git/
├── .gitignore
├── README.md
├── CLAUDE.md
├── requirements.txt
├── src/
│   └── __init__.py
├── tests/
│   └── __init__.py
└── .wrd/
    └── config.json
🧪 Testing
Run the test suite with:
pytest tests/
📚 Documentation
For detailed documentation, please visit our documentation site.
🤝 Contributing
Contributions are welcome! Please read our contributing guidelines before submitting pull requests.
📄 License
This project is licensed under the MIT License - see the LICENSE file for details.
📞 Support
For support, please open an issue in the issue tracker.
Fedora-Specific Setup (Optional)
If you’re using Fedora, you can use the following setup script:
# Run the setup script
curl -fsSL https://raw.githubusercontent.com/wronai/wrd/main/fedora.sh | bash

# Or download and run manually:
wget https://raw.githubusercontent.com/wronai/wrd/main/fedora.sh
chmod +x fedora.sh
./fedora.sh
After running the script:
# Reload your shell configuration
source ~/.bashrc

# Verify the installation
cc-workspace
# Przejdź do workspace
cc-workspace

# Sklonuj repozytorium WRD
git clone https://github.com/wronai/wrd.git
cd wrd

# Utwórz dedykowane środowisko wirtualne dla WRD
python3 -m venv ~/.wrd-env
source ~/.wrd-env/bin/activate

# Instalacja w trybie deweloperskim
pip install -e .

# Dodaj ścieżkę do PATH (w ~/.bashrc)
echo 'export PATH="$HOME/.wrd-env/bin:$PATH"' >> ~/.bashrc
source ~/.bashrc
Metoda B: Instalacja przez pip (gdy będzie dostępne)
pip install wrd
Metoda C: Budowanie z źródła
# Pobierz wszystkie pliki WRD
mkdir -p ~/wrd-build
cd ~/wrd-build

# Skopiuj kod główny (plik wrd.py)
# Skopiuj pliki setup (setup.py, pyproject.toml, etc.)
# [Pliki są dostępne w artefaktach Claude]

# Instalacja
python3 -m venv venv
source venv/bin/activate
pip install --upgrade pip setuptools wheel
pip install -e .
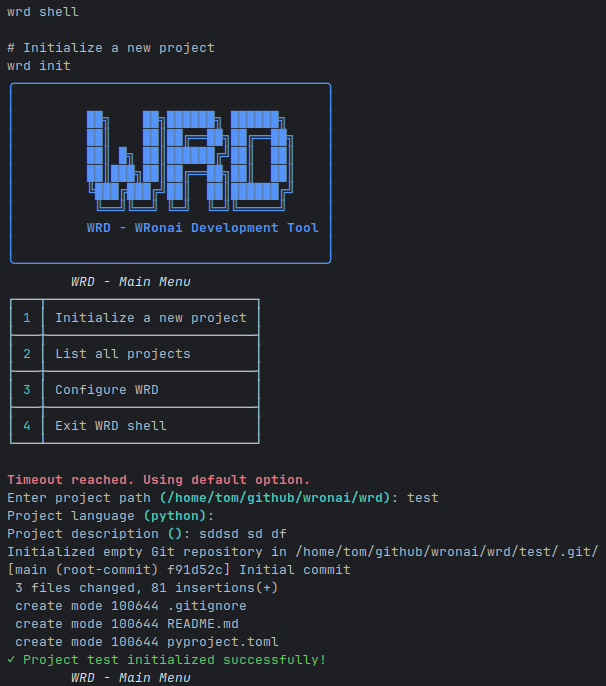
Krok 3: Konfiguracja WRD
# Pierwszy start - automatyczna konfiguracja
wrd status

# Sprawdź czy wszystko działa
wrd list

# Utwórz pierwszy projekt testowy
wrd create test-project --description "Testowy projekt WRD"

# Sprawdź strukturę
ls -la ~/claude-projects/test-project/
Krok 4: Integracja z Claude Code
Instalacja Claude Code
- Zaloguj się na https://claude.ai
- Przejdź do ustawień → API
- Wygeneruj klucz API (wymaga Claude Pro)
- Pobierz Claude Code CLI według oficjalnej dokumentacji Anthropic
Konfiguracja
# Ustaw klucz API (przykład)
export ANTHROPIC_API_KEY="your-api-key-here"

# Dodaj do ~/.bashrc dla trwałości
echo 'export ANTHROPIC_API_KEY="your-api-key-here"' >> ~/.bashrc

# Sprawdź instalację Claude Code
claude-code --version
Krok 5: Workflow setup
Tworzenie pierwszego prawdziwego projektu
# Utwórz projekt
wrd create moj-pierwszy-ai-projekt --type python --description "Pierwszy projekt z Claude Code"

# Przejdź do projektu
cd ~/claude-projects/moj-pierwszy-ai-projekt

# Aktywuj środowisko Python
source venv/bin/activate

# Zainicjalizuj git
git init
git add .
git commit -m "Initial commit via WRD"

# Edytuj CLAUDE.md - dodaj specyfikację projektu
nano CLAUDE.md

# Zacznij pracę z Claude Code
claude-code init  # lub odpowiednia komenda
Testowanie workflow
# Test 1: Tworzenie kodu
echo "print('Hello from WRD!')" > src/main.py

# Test 2: Aktualizacja postępu
wrd progress moj-pierwszy-ai-projekt "Dodano główny plik aplikacji"

# Test 3: Automatyczny commit
wrd commit moj-pierwszy-ai-projekt --message "Dodanie main.py"

# Test 4: Backup
wrd backup

# Test 5: Status
wrd status
Krok 6: Integracja z innymi narzędziami
Cursor IDE
# Jeśli masz Cursor zainstalowany
cursor ~/claude-projects/moj-pierwszy-ai-projekt
Gemini CLI (opcjonalnie)
# Instalacja Gemini CLI według dokumentacji Google
# Konfiguracja w WRD
nano ~/.wrd/config.json
# Ustaw "gemini_cli": {"enabled": true, "priority": 2}
SSH dla zdalnej pracy
# Sprawdź czy SSH działa
sudo systemctl status sshd

# Test połączenia z telefonu/innego urządzenia
ssh wronai@your-fedora-ip

# Na zdalnym urządzeniu:
cc-workspace
wrd status
Krok 7: Zaawansowana konfiguracja
Aliasy i funkcje pomocnicze
Dodaj do ~/.bashrc:
# WRD shortcuts
alias w='wrd'
alias ws='wrd status'
alias wl='wrd list'
alias wp='wrd progress'
alias wb='wrd backup'

# Claude Code shortcuts
alias cc='claude-code'
alias ccd='claude-code dev'
alias ccb='claude-code build'

# Combined workflow functions
wcc-start() {
    wrd create "$1" --type "${2:-python}" --description "${3:-AI project}"
    cd ~/claude-projects/"$1"
    source venv/bin/activate
    echo "Projekt $1 gotowy. Uruchom: claude-code dev"
}

wcc-session() {
    cd ~/claude-projects/"$1" || { echo "Projekt nie istnieje"; return 1; }
    source venv/bin/activate
    echo "Sesja $1 uruchomiona. Czas: $(date)"
    wrd progress "$1" "Rozpoczęcie sesji $(date '+%H:%M')"
}
Automatyczne backup
# Dodaj cron job dla automatycznych backup (opcjonalnie)
(crontab -l 2>/dev/null; echo "0 */6 * * * /home/$USER/.wrd-env/bin/wrd backup > /dev/null 2>&1") | crontab -
Monitoring sesji
# Skrypt do monitorowania czasu sesji (5h limit Claude Code)
cat > ~/claude-projects/scripts/session-monitor.sh << 'EOF'
#!/bin/bash
echo "⏰ Monitor sesji Claude Code (limit 5h)"
start_time=$(date +%s)
while true; do
    current_time=$(date +%s)
    elapsed=$((current_time - start_time))
    hours=$((elapsed / 3600))
    minutes=$(((elapsed % 3600) / 60))

    if [ $hours -ge 4 ]; then
        echo "⚠️  UWAGA: Zbliżasz się do limitu! Czas: ${hours}h ${minutes}m"
    fi

    if [ $hours -ge 5 ]; then
        echo "🛑 LIApache OSIĄGNIĘTY! Reset za $(date -d '+5 hours' '+%H:%M')"
        break
    fi

    sleep 300  # Check every 5 minutes
done
EOF

chmod +x ~/claude-projects/scripts/session-monitor.sh
Krok 8: Rozwiązywanie problemów
Problem: Brak uprawnień Docker
sudo usermod -aG docker $USER
newgrp docker
# lub zaloguj się ponownie
Problem: Python venv nie działa
# Reinstalacja python3-venv
sudo dnf reinstall python3-venv
# Usuń stare środowisko
rm -rf ~/.wrd-env
# Stwórz nowe
python3 -m venv ~/.wrd-env
source ~/.wrd-env/bin/activate
pip install -e ~/wrd-build/
Problem: Claude Code nie działa
# Sprawdź klucz API
echo $ANTHROPIC_API_KEY

# Sprawdź połączenie internetowe
curl -s https://api.anthropic.com/v1/messages

# Sprawdź wersję
claude-code --version
Problem: Brak miejsca na dysku
# Wyczyść stare backup
wrd backup  # Nowy backup
rm ~/claude-projects/archive/backup-*.tar.gz.old

# Wyczyść cache pip
pip cache purge

# Wyczyść Docker (jeśli używasz)
docker system prune -a
Krok 9: Pierwsze prawdziwe użycie
Scenariusz: Projekt w 48h (konkurs)
# Dzień 1 - Setup (wieczór)
wcc-start konkurs-super-app fastapi "Aplikacja konkursowa - API + Frontend"

# Otwórz Claude.ai w przeglądarce
# Stwórz szczegółową specyfikację
# Skopiuj do CLAUDE.md

# Dzień 2 - Sesja #1 (rano, 5h)
wcc-session konkurs-super-app
# Uruchom session-monitor w drugim terminalu
~/claude-projects/scripts/session-monitor.sh &
# Rozpocznij pracę z Claude Code
claude-code dev

# Po sesji
wrd progress konkurs-super-app "Sesja 1 zakończona - podstawowa struktura API"
wrd commit konkurs-super-app "Implementacja podstawowego API"

# Dzień 2 - Sesja #2 (po przerwie, 3h)
# Podobnie jak wyżej...

# Finalizacja
wrd progress konkurs-super-app "Aplikacja gotowa do zgłoszenia!"
wrd backup
Scenariusz: Długoterminowe narzędzie
# Tydzień 1
wcc-start moje-cli-tool python "Autorskie narzędzie CLI"
# Rozwój iteracyjny...

# Tydzień 2
wrd progress moje-cli-tool "Tydzień 2 - dodano funkcje X, Y, Z"

# Tydzień 3
wrd progress moje-cli-tool "Tydzień 3 - optymalizacja i testy"
🎉 Gratulacje!
Masz teraz w pełni skonfigurowane środowisko WRD na Fedorze z integracją Claude Code.
Następne kroki:
- Stwórz pierwszy prawdziwy projekt
- Przetestuj workflow 5-godzinnych sesji
- Rozwijaj własne techniki i flow
- Dokumentuj wszystko w CLAUDE.md
- Dziel się doświadczeniami z community!
Przydatne komendy do zapamiętania:
wrd status- sprawdź statuswcc-start nazwa typ- nowy projekt + sesjawrd progress projekt "opis"- zaktualizuj postępwrd backup- zabezpiecz pracę