git2wp
WordPress Git Publisher 🚀
![]()
![]()
![]()
Automatically generate and publish WordPress articles based on Git activity using AI (Ollama).
Note: This README is also available in Polish below.
Table of Contents
- ✨ Features
- 🚀 Quick Start
- ⚙️ Configuration
- 🛠️ Requirements
- 📦 Installation
- 🔧 Usage
- 📁 Project Structure
- 🤝 Contributing
- 📄 License
✨ Features
- 📁 Git Repository Scanning - Automatically detect projects in
github/*/*structure - 🤖 AI Article Generation - Utilizes Ollama with support for Mistral 7B, Llama2, CodeLlama
- 📝 WordPress Publishing - Direct publishing via WordPress REST API
- 🎯 Commit Analysis - Detailed analysis of code changes for the selected day
- 📊 Content Preview - Preview articles before publishing
- 🔐 Secure Authorization - WordPress Application Passwords support
- 🚀 Easy Setup - Simple configuration via
.envfile - 🔄 Auto-Reload - Development mode with automatic server restart
🚀 Quick Start
Using Docker (Recommended)
- Clone the repository
git clone https://github.com/your-username/wordpress-git-publisher.git cd wordpress-git-publisher - Configure environment
cp .env.example .env # Edit .env with your WordPress credentials and other settings - Start with Docker Compose
docker compose up -d - Access the web interface
http://localhost:9000
Manual Installation
- Clone and install dependencies
git clone https://github.com/your-username/wordpress-git-publisher.git cd wordpress-git-publisher make install - Configure environment
cp .env.example .env # Edit .env with your configuration - Start the application
make start
📦 What’s New in v1.1.0
- Added support for environment variables via
.envfile - New
start.shandstop.shscripts for easier service management - Updated Makefile with better development environment support
- Improved error handling and logging
- Automatic configuration detection from
.envfile
🔧 Usage
Starting Services
- Using Docker Compose (Recommended)
# Start all services docker compose up -d # View logs docker compose logs -f # Stop services docker compose down - Using Make (Manual Installation)
# Start all services
make start

# Start frontend only
make frontend

# Start backend only
make backend
Publishing Articles
- Configure WordPress Settings
- Open
http://localhost:9000/settings.html - Enter your WordPress URL, username, and application password
- Configure Ollama settings (default URL: http://localhost:11434)
- Save the configuration
- Open
- Scan Git Repositories
- Open
http://localhost:9000 - The app will scan for Git repositories in the
github/*/*structure - Select a repository from the dropdown
- Open
- Generate and Publish Articles
- Choose a date to analyze Git activity
- Click “Generate” to create an article using AI
- Preview and edit the content if needed
- Click “Publish” to post to WordPress
- Monitor Status
- Check frontend health at
http://localhost:9000/health - Check backend health at
http://localhost:3001/api/health - View logs in the
logsdirectory - Review and click “Publish” to post to WordPress
- Check frontend health at
- Via Command Line
# Replace YYYY-MM-DD with your target date
make publish date=YYYY-MM-DD
Example:
make publish date=2025-06-05
Monitoring
- Frontend Logs: Available at
logs/frontend.log - Backend Logs: Available at
logs/backend.log - Health Checks:
- Frontend:
http://localhost:9000/health - Backend:
http://localhost:3001/api/health
- Frontend:
⚙️ Configuration
Environment Variables
Copy .env.example to .env and update the values:
cp .env.example .env
nano .env  # or use your preferred text editor
Required Environment Variables
# Server Configuration
PORT=3001
NODE_ENV=development

# Frontend Configuration
FRONTEND_PORT=8088
API_URL=http://localhost:3001

# WordPress Configuration
WORDPRESS_URL=https://your-wordpress-site.com
WORDPRESS_USERNAME=your_username
WORDPRESS_PASSWORD=your_application_password

# Ollama Configuration
OLLAMA_BASE_URL=http://localhost:11434
DEFAULT_MODEL=mistral:7b

# Git Configuration
GIT_SCAN_DEPTH=3
GIT_PATH=/path/to/your/repositories

# Logging
LOG_LEVEL=debug
LOG_FILE=logs/app.log
🛠️ Requirements
Software
- Node.js >= 16.0.0
- npm >= 8.0.0
- Git installed and configured
- Ollama with a supported AI model
Services
- WordPress with REST API enabled
- Application Password configured in WordPress
⚙️ Konfiguracja
Plik .env
Skopiuj plik .env.example do .env i zaktualizuj wartości:
cp .env.example .env
nano .env  # lub inny edytor tekstu
Wymagane zmienne środowiskowe
# Server Configuration
PORT=3001
NODE_ENV=development

# Frontend Configuration
FRONTEND_PORT=8088
API_URL=http://localhost:3001

# WordPress Configuration
WORDPRESS_URL=https://twoja-strona.com
WORDPRESS_USERNAME=twoj_uzytkownik
WORDPRESS_PASSWORD=twoje_haslo_lub_application_password

# Ollama Configuration
OLLAMA_BASE_URL=http://localhost:11437
DEFAULT_MODEL=mistral:7b

# Git Configuration
GIT_SCAN_DEPTH=3
GIT_PATH=/sciezka/do/twoich/repozytoriow

# Logging
LOG_LEVEL=debug
LOG_FILE=logs/app.log
🛠️ Wymagania
Oprogramowanie
- Node.js >= 16.0.0
- npm >= 8.0.0
- Git zainstalowany i skonfigurowany
- Ollama z wybranym modelem AI
Usługi
- WordPress z włączonym REST API
- Application Password skonfigurowane w WordPress
📦 Installation
1. Clone the repository
git clone https://github.com/your-username/wordpress-git-publisher.git
cd wordpress-git-publisher
2. Install dependencies
make install
# or
npm install
3. Configure Ollama
Install Ollama
# Linux/macOS
curl -fsSL https://ollama.ai/install.sh | sh

# Or download from https://ollama.ai/download for Windows

# Start Ollama
ollama serve

# Download a model (in a separate terminal)
ollama pull mistral:7b
4. WordPress Configuration
Generate Application Password:
- Log in to WordPress Admin
- Go to Users → Your Profile
- Scroll down to the Application Passwords section
- Enter a name for your application (e.g., “Git Publisher”)
- Click Add New Application Password
- Copy the generated password (it will only be shown once!)
🔧 Usage
Available Commands
# Install dependencies
make install

# Start the application
make start

# Stop the application
make stop

# Restart the application
make restart

# Start in development mode with auto-reload
make dev

# Clean up temporary files
make clean

# Remove node_modules and logs
make distclean

# Show help
make help
Web Interface
- WordPress Configuration
- WordPress URL:
https://your-wordpress-site.com - Username: Your WordPress username
- Application Password: The password generated in the WordPress settings
- Click “Test Connection”
- WordPress URL:
- Ollama Configuration
- Ollama URL:
http://localhost:11434(default) - Model: Select an available model (e.g.,
mistral:7b) - Click “Test Ollama”
- Ollama URL:
- Git Configuration
- GitHub Folders Path:
/path/to/your/github/reposorC:\Users\username\github - Analysis Date: Select a date (defaults to today)
- Click “Scan Git Projects”
- GitHub Folders Path:
- Generate Article
- Optionally provide a custom title
- Category: WordPress category name
- Tags: Comma-separated tags
- Click “Generate and Publish Article”
- Publish
- Review the generated article in the preview section
- Click “Publish to WordPress”
- You’ll receive a link to the published article
📋 Instrukcja użytkowania
1. Konfiguracja WordPress
- URL WordPress:
https://twoja-domena.com - Nazwa użytkownika: Twoja nazwa użytkownika WP
- Application Password: Hasło wygenerowane w kroku 4
- Kliknij “Testuj połączenie”
2. Konfiguracja Ollama
- URL Ollama:
http://localhost:11434(domyślne) - Model: Wybierz dostępny model (np.
mistral:7b) - Kliknij “Testuj Ollama”
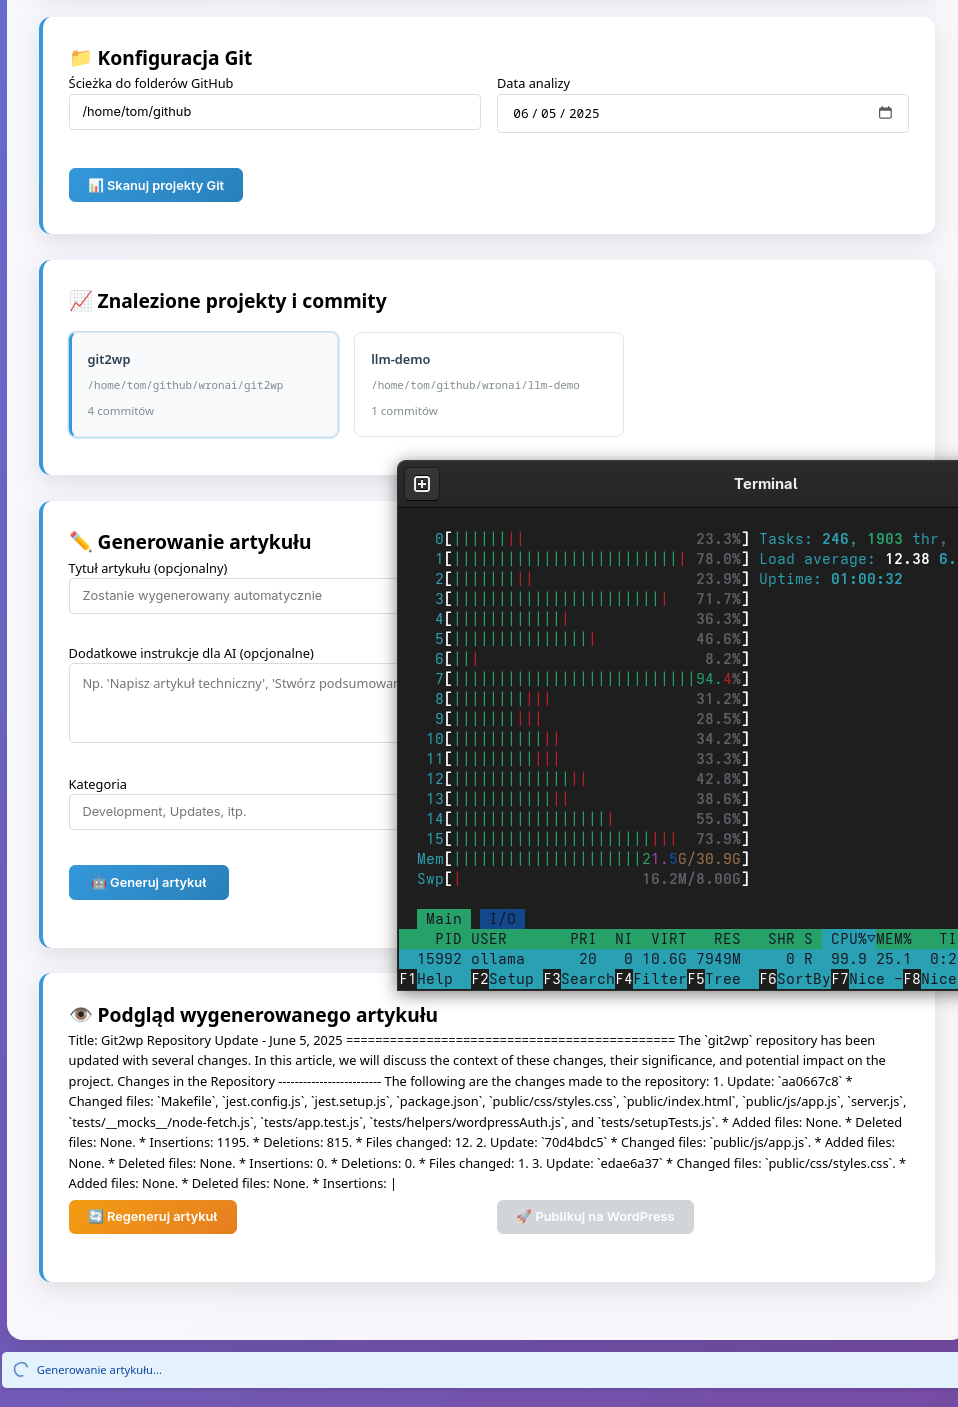
3. Konfiguracja Git
- Ścieżka do folderów GitHub:
/home/user/githublubC:\Users\user\github - Data analizy: Wybierz datę (domyślnie dzisiaj)
- Kliknij “Skanuj projekty Git”
4. Generowanie artykułu
- Opcjonalnie: Podaj własny tytuł artykułu
- Kategoria: Nazwa kategorii WordPress
- Tagi: Tagi oddzielone przecinkami
- Kliknij “Generuj i publikuj artykuł”
5. Publikacja
- Przejrzyj wygenerowany artykuł w sekcji podglądu
- Kliknij “Publikuj na WordPress”
- Otrzymasz link do opublikowanego artykułu
📁 Project Structure
wordpress-git-publisher/
├── server.js              # Backend Express.js
├── package.json           # Node.js dependencies
├── package-lock.json      # Lock file for dependencies
├── public/                # Frontend assets
│   ├── css/
│   │   └── styles.css    # Frontend styles
│   ├── js/
│   │   └── app.js       # Frontend JavaScript
│   └── index.html         # Frontend application
├── logs/                  # Application logs
├── .env.example          # Example environment variables
├── .gitignore            # Git ignore rules
├── Makefile              # Development tasks
├── start.sh              # Startup script
├── stop.sh               # Shutdown script
└── README.md             # This documentation
🤝 Contributing
Contributions are welcome! Please feel free to submit a Pull Request.
- Fork the repository
- Create your feature branch (
git checkout -b feature/AmazingFeature) - Commit your changes (
git commit -m 'Add some AmazingFeature') - Push to the branch (
git push origin feature/AmazingFeature) - Open a Pull Request
📄 License
This project is licensed under the MIT License - see the LICENSE file for details.
Polski
✨ Funkcje
- 📁 Skanowanie repozytoriów Git - Automatyczne wykrywanie projektów w strukturze
github/*/* - 🤖 Generowanie artykułów AI - Wykorzystanie Ollama z modelami Mistral 7B, Llama2, CodeLlama
- 📝 Publikacja na WordPress - Bezpośrednie publikowanie przez WordPress REST API
- 🎯 Analiza commitów - Szczegółowa analiza zmian w kodzie z danego dnia
- 📊 Podgląd treści - Możliwość przejrzenia artykułu przed publikacją
- 🔐 Bezpieczna autoryzacja - Wsparcie dla Application Passwords WordPress
- 🚀 Łatwa konfiguracja - Prosta konfiguracja przez plik
.env - 🔄 Automatyczne przeładowanie - Tryb developerski z automatycznym restartem serwera
🚀 Szybki start
- Sklonuj repozytorium
git clone https://github.com/your-username/wordpress-git-publisher.git cd wordpress-git-publisher - Zainstaluj zależności
make install - Skonfiguruj środowisko
cp .env.example .env # Edytuj plik .env zgodnie z konfiguracją - Uruchom aplikację
make start - Otwórz interfejs w przeglądarce
http://localhost:3001
🔧 Użycie
Dostępne komendy
# Instalacja zależności
make install

# Uruchomienie aplikacji
make start

# Zatrzymanie aplikacji
make stop

# Restart aplikacji
make restart

# Uruchomienie w trybie developerskim z automatycznym przeładowywaniem
make dev

# Czyszczenie plików tymczasowych
make clean

# Usunięcie node_modules i logów
make distclean

# Wyświetlenie pomocy
make help
📄 Licencja
Ten projekt jest dostępny na licencji MIT - szczegóły w pliku LICENSE.
🔧 API Endpoints
| Endpoint | Method | Description |
|---|---|---|
/api/health |
GET | Check server status |
/api/test-wordpress |
POST | Test WordPress connection |
/api/test-ollama |
POST | Test Ollama connection |
/api/scan-git |
POST | Scan Git repositories |
/api/generate-article |
POST | Generate AI article |
/api/publish-wordpress |
POST | Publish to WordPress |
📊 Git Data Format
The application analyzes the following commit information:
- Commit hash (short and full)
- Commit message
- Author and email
- Commit date
- List of changed files
- Change statistics (+/- lines)
- Current branch
- Remote repository URL
🎨 Example Generated Article
<h1>Project Updates - 2025-06-04</h1>

<p>Today was a productive day in my development projects...</p>
Projekt: wordpress-publisher
W projekcie wordpress-publisher zrealizowałem następujące zadania:
- Dodano system autoryzacji OAuth (auth.js, auth.test.js)
- Naprawiono błąd połączenia z bazą danych (db.js)
Podsumowanie
Łącznie dzisiaj wykonałem 5 commitów w 2 projektach...
## 🛡️ Bezpieczeństwo

- **Application Passwords** zamiast zwykłych haseł WordPress
- **Lokalne przetwarzanie** - dane Git nie opuszczają Twojego serwera
- **HTTPS zalecane** dla produkcji
- **Walidacja danych** na wszystkich endpointach API

## 🚀 Uruchamianie aplikacji

### Rozpoczęcie pracy

```bash
# Instalacja zależności
make install

# Uruchomienie serwerów (backend i frontend)
make start

# W przeglądarce otwórz:
# - Frontend: http://localhost:8088
# - Backend API: http://localhost:3001
Inne przydatne komendy
# Zatrzymanie wszystkich usług
make stop

# Restart usług
make restart

# Tryb developerski z automatycznym przeładowaniem
make dev

# Czyszczenie plików tymczasowych
make clean

# Pełne czyszczenie (włącznie z node_modules)
make distclean
🔧 Rozwiązywanie problemów
Błąd: “Ollama nie odpowiada”
# Sprawdź czy Ollama działa
ollama list

# Uruchom Ollama jeśli nie działa
ollama serve
Błąd: “Brak modelu mistral:7b”
# Pobierz wymagany model
ollama pull mistral:7b

# Sprawdź dostępne modele
ollama list
Błąd: “WordPress 401 Unauthorized”
- Sprawdź czy Application Password jest poprawne
- Upewnij się, że użytkownik ma uprawnienia do publikowania
- Sprawdź czy WordPress REST API jest włączone
Błąd: “Nie znaleziono repozytoriów Git”
- Sprawdź ścieżkę do folderów GitHub
- Upewnij się, że foldery zawierają repozytoria Git (folder .git)
- Sprawdź uprawnienia do odczytu folderów
🚀 Development
Tryb developmentu
npm run dev # Nodemon z auto-restartowaniem
Uruchomienie testów
npm test
Linting kodu
npm run lint
📄 Licencja
MIT License - zobacz plik LICENSE
🤝 Wsparcie
W razie problemów:
- Sprawdź sekcję rozwiązywania problemów
- Sprawdź logi w konsoli przeglądarki i terminalu
- Otwórz issue na GitHub
🔄 Aktualizacje
Aby zaktualizować aplikację:
git pull origin main
npm install
npm restart
Autor: Twój Developer
Wersja: 1.0.0
Data: 2025-06-04